Here are a few contractors that we trust, please feel free to reference Texas House Check!
Mold Remediation, Duct cleaning and General rebuild - (713)295-9453
Landscaper/Maid Services
General Contractors
This email address is being protected from spambots. You need JavaScript enabled to view it.
HVAC Contractor

https://terrysacandheating.com/
Septic Inspection and design
Concrete Work
Arborists
There was a time when the only remedy for sinking sidewalks or uneven foundations was to tear out the old pavement slab and pour a new one, and spend a great deal of time and money in the process. Today, a less intensive alternative known as mudjacking (also called concrete leveling, pressure grouting or slabjacking) pumps
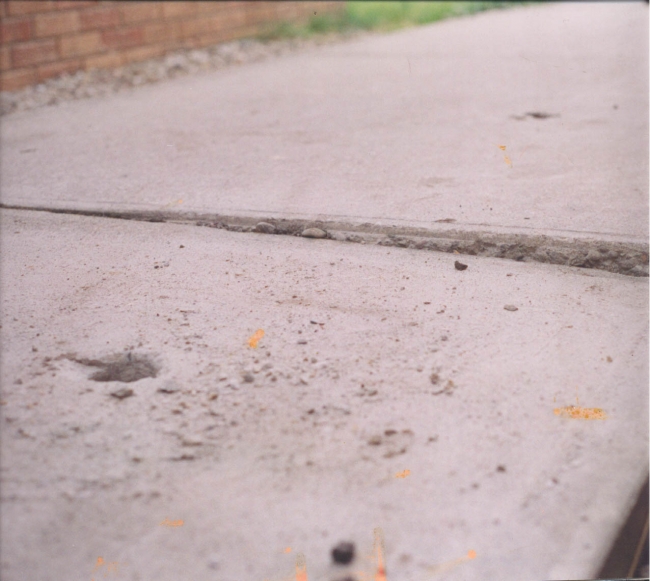 slurry beneath a sunken concrete slab in order to raise it back into place.
While this is not a complicated procedure, it should be performed only by a trained professional, as amateur workmanship may cause even more extensive damage. Drain pipes, sewers and utilities must be located and avoided, and the area must be evaluated as to whether it can survive the mudjacking process.
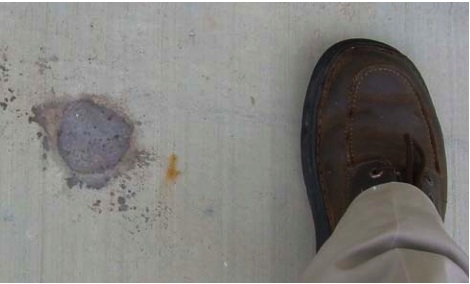
- efficiency. Mudjacking requires less equipment and fewer workers. Adjacent plants and landscaping are also disturbed less, as are neighbors, tenants and passersby by the loud noise, dust and cumbersome equipment;
- price. Mudjacking typically costs roughly half as much as concrete replacement because there is little need for new cement or the removal of old concrete. The overall cost is based on the area of concrete that must be lifted, which may be as little as $5 per foot. Thus, for a 5x4-foot job, it might cost just $60, although the mudjacker may charge more if the area is in a hard-to-reach location;
- speed. Mudjacking takes hours, while certain concrete pours may take days; and
- environmentally friendly. Mudjacking makes use of perfectly good concrete, which would otherwise be sent to a landfill.
- The concrete surface is spalling or otherwise damaged. The mudjacking process might further damage the surface, which will still be defective even after it’s raised back into place.
- The concrete has risen, caused by expansive soil. The only solution for this defect is to re-pour the cement.
- The cause of the settling is not addressed. If the soil has settled due to some external factor, the problem must be fixed or the soil will sink again in the future. For instance, a gutter downspout that drains onto a concrete edge must be corrected in order to avoid the need for future repair.
- The underlying soil is swampy.
- There is a sinkhole beneath the concrete.
If your septic tank failed, or you know someone whose did, you are not alone. As a homeowner, you are responsible for maintaining your septic system. Proper septic system maintenance will help keep your system from failing and will help maintain your investment in your home. Failing septic systems can contaminate the ground water that you and your neighbors drink and can pollute nearby rivers, lakes and coastal waters.
- Locate your septic tank and drainfield. Keep a drawing of these locations in your records.
- Have your septic system inspected at least every three years. Hire an InterNACHI inspector trained in septic inspections.
- Pump your septic tank as needed (generally, every three to five years).
- Don't dispose of household hazardous waste in sinks or toilets.
- Keep other household items, such as dental floss, feminine hygiene products, condoms, diapers, and cat litter out of your system.
- Use water efficiently.
- Plant only grass over and near your septic system. Roots from nearby trees or shrubs might clog and damage the system. Also, do not apply manure or fertilizers over the drainfield.
- Keep vehicles and livestock off your septic system. The weight can damage the pipes and tank, and your system may not drain properly under compacted soil.
- Keep gutters and basement sump pumps from draining into or near your septic system.
- Check with your local health department before using additives. Commercial septic tank additives do not eliminate the need for periodic pumping and can be harmful to your system.
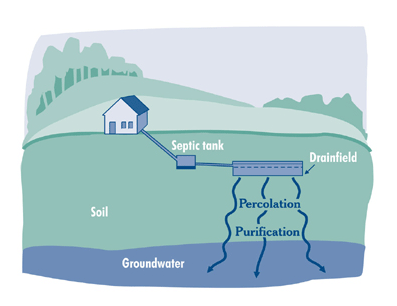 the soil. Microbes in the soil digest and remove most contaminants from wastewater before it eventually reaches groundwater. The septic tank is a buried, watertight container typically made of concrete, fiberglass, or polyethylene. It holds the wastewater long enough to allow solids to settle out (forming sludge), and oil and grease to float to the surface (as scum). It also allows partial decomposition of the solid materials. Compartments and a T-shaped outlet in the septic tank prevent the sludge and scum from leaving the tank and traveling into the drainfield area. Screens are also recommended to keep solids from entering the drainfield. The wastewater exits the septic tank and is discharged into the drainfield for further treatment by the soil. Micro-organisms in the soil provide final treatment by removing harmful bacteria, viruses and nutrients.
Your septic system is your responsibility!
- Plant only grass over and near your septic system. Roots from nearby trees or shrubs might clog and damage the drainfield.
- Don’t drive or park vehicles on any part of your septic system. Doing so can compact the soil in your drainfield or damage the pipes, the tank or other septic system components.
- Keep roof drains, basement sump pump drains, and other rainwater and surface water drainage systems away from the drainfield. Flooding the drainfield with excessive water slows down or stops treatment processes and can cause plumbing fixtures to back up.

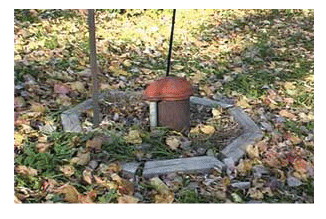 systems serving many people, they do not have experts regularly checking the water’s source and its quality before it is sent to the tap. These households must take special precautions to ensure the protection and maintenance of their drinking water supplies.
To keep your well safe, you must be sure that possible sources of contamination are not close by. Experts suggest the following distances as a minimum for protection — farther is better(see graphic on the right):
- septic tanks: 50 feet;
- livestock yards, silos, septic leach fields: 50 feet;
- petroleum tanks, liquid-tight manure storage and fertilizer storage and handling: 100 feet; and
- manure stacks: 250 feet.
Many homeowners tend to forget the value of good maintenance until problems reach crisis-levels. That can be expensive. It’s better to maintain your well, find problems early, and correct them to protect your well’s performance. Keep up-to-date records of well installation and repairs, plus pumping and water tests. Such records can help spot changes and possible problems with your water system. If you have problems, ask a local expert to check your well construction and maintenance records. He or she can see if your system is okay or needs work.
Protect your own well area. Be careful about storage and disposal of household and lawn-care chemicals and wastes. Good farmers and gardeners minimize the use of fertilizers and pesticides. Take steps to reduce erosion and prevent surface water runoff. Regularly check underground storage tanks that hold home heating oil, diesel, or gasoline. Make sure your well is protected from the wastes of livestock, pets and wildlife.
Dug wells are holes in the ground dug by shovel or backhoe. Historically, a dug well was excavated below the ground water table until incoming water exceeded the digger’s bailing rate. The well was then lined (cased) with stones, brick, tile, or other material to prevent collapse. It was covered with a cap of wood, stone or concrete. Since it is so difficult to dig beneath the ground water table, dug wells are not very deep. Typically, they are only 10 to 30 feet deep. Being so shallow, dug wells have the highest risk of becoming contaminated.To minimize the likelihood of contamination, your dug well should have certain features. These features help to prevent contaminants from traveling along the  outside of the casing, or through the casing and into the well.
Dug Well Construction Features
- The well should be cased with a watertight material (for example, tongue-and-groove pre-cast concrete), and a cement grout or bentonite clay sealant poured along the outside of the casing to the top of the well.
- The well should be covered by a concrete curb and cap that stands about a foot above the ground.
- The land surface around the well should be mounded so that surface water runs away from the well and is not allowed to pond around the outside of the wellhead.
- Ideally, the pump for your well should be inside your home or in a separate pump house, rather than in a pit next to the well.
Land activities around a dug well can also contaminate it. While dug wells have been used as a household water supply source for many years, most are relics of older homes, dug before drilling equipment was readily available, or when drilling was considered too expensive. If you have a dug well on your property and are using it for drinking water, check to make sure it is properly covered and sealed. Another problem relating to the shallowness of a dug well is that it may go dry during a drought when the ground water table drops.
Driven Well Construction Features
- Assembled lengths of 2- to 3-inch diameter metal pipes are driven into the ground. A screened “well point” located at the end of the pipe helps drive the pipe through the sand and gravel. The screen allows water to enter the well and filters out sediment.
- The pump for the well is in one of two places: on top of the well, or in the house. An access pit is usually dug around the well down to the frost line, and a water discharge pipe to the house is joined to the well pipe with a fitting.
- The well and pit are capped with the same kind of large-diameter concrete tile used for a dug well. The access pit may be cased with pre-cast concrete.
To minimize this risk, the well cover should be a tight-fitting concrete curb and cap with no cracks, and should sit about a foot above the ground. Slope the ground away from the well so that surface water will not pond around the well. If there’s a pit above the well, either to hold the pump or to access the fitting, you may also be able to pour a grout sealant along the outside of the well pipe. Protecting the water quality requires that you maintain proper well construction and monitor your activities around the well. It is also important to follow the same land-use precautions around the driven well as described under dug wells.
![]()
Drilled Wells
Drilled wells penetrate about 100 to 400 feet into the bedrock. Where you find bedrock at the surface, it is commonly called ledge. To serve as a water supply, a drilled well must intersect bedrock fractures containing ground water.
Drilled Well Construction Features
-
The casing is usually metal or plastic pipe, 6 inches in diameter, that extends into the bedrock to prevent shallow ground water from entering the well. By law, the casing has to extend at least 18 feet into the ground, with at least 5 feet extending into the bedrock. The casing should also extend a foot or two above the ground’s surface. A sealant, such as cement grout or bentonite clay, should be poured along the outside of the casing to the top of the well. The well should be capped to prevent surface water from entering the well.
-
Submersible pumps, located near the bottom of the well, are most commonly used in drilled wells. Wells with a shallow water table may feature a jet pump located inside the home. Pumps require special wiring and electrical service. Well pumps should be installed and serviced by a qualified professional registered with your state.
-
Most modern drilled wells incorporate a pitless adapter designed to provide a sanitary seal at the point where the discharge water line leaves the well to enter your home. The device attaches directly to the casing below the frost line, and provides a watertight sub-surface connection, protecting the well from frost and contamination.
-
Older drilled wells may lack some of these sanitary features. The well pipe used was often 8, 10 or 12 inches in diameter, and covered with a concrete well cap either at or below the ground’s surface. This outmoded type of construction does not provide the same degree of protection from surface contamination. Also, older wells may not have a pitless adapter to provide a seal at the point of discharge from the well.
Hydrofracting a Drilled Well
Hydrofracting is a process that applies water or air under pressure into your well to open up existing fractures near your well, and can even create new ones. Often, this can increase the yield of your well. This process can be applied to new wells with insufficient yield and to improve the quantity of older wells.
How can I test the quality of my private drinking water supply?
|
The first step to protect your health and the health of your family is learning about what may pollute your source of drinking water. Potential contamination may occur naturally, or as a result of human activity. What are some naturally occurring sources of pollution?
What human activities can pollute ground water?
|
|
Private, individual wells are the responsibility of the homeowner. To help protect your well, here are some steps you can take: Have your water tested periodically. It is recommended that water be tested every year for total coliform bacteria, nitrates, total dissolved solids, and pH levels. If you suspect other contaminants, test for those. Always use a state-certified laboratory that conducts drinking water tests. Since these can be expensive, spend some time identifying potential problems. Consult your InterNACHI inspector for information about how to go about water testing.
Identify potential problems as the first step to safe-guarding your drinking water. The best way to start is to consult a local expert -- someone who knows your area, such as the local health department, agricultural extension agent, a nearby public water system, or a geologist at a local university. Be aware of your surroundings. As you drive around your community, take note of new construction. Check the local newspaper for articles about new construction in your area. Check the paper or call your local planning and zoning commission for announcements about hearings or zoning appeals on development or industrial projects that could possibly affect your water.Attend these hearings, ask questions about how your water source is being protected, and don't be satisfied with general answers. Ask questions, such as: "If you build this landfill, what will you do to ensure that my water will be protected?" See how quickly they answer and provide specifics about what plans have been made to specifically address that issue. Identify Potential Problem SourcesTo start your search for potential problems, begin close to home. Do a survey around your well to discover:
If any of these items apply, it may be best to have your water tested and talk to your local public health department or agricultural extension agent to find ways to change some of the practices which can affect your private well. |
Common Sources of Ground Water Contamination
| Category | Contaminant Source |
| Agricultural |
|
| Commercial |
|
| Industrial |
|
| Residential |
|
| Other |
|
Soil is a naturally-occurring mixture of mineral and organic ingredients with a definite form, structure, and composition. It’s composed primarily of minerals which are produced from parent material which is broken into small pieces by weathering. Larger pieces are stones, gravel, and other rock debris. Smaller particles are sand, silt, or clay. Since the original materials vary from place to place, the exact composition of soil varies according to location. A common example of soil composition by volume might be:
- 45% Minerals (clay, silt, sand, gravel, stones).
- 25% Water (the amount varies depending upon precipitation and the water-holding capacity of the soil).
- 25% Air (an essential ingredient for living organisms).
- 5% Organic matter or humus (both living and dead organisms).
Mineral particles give soil texture. Sand particles range in diameter from 2 mm to 0.05 mm, feel gritty and can be easily seen with the unaided eye. Silt particles are between 0.05 mm and 0.002 mm and feel like flour. Clay particles are smaller than 0.002 mm and cannot be seen with the unaided eye. Because of the small particle size, clay soils can sometimes experience large amounts of expansion and contraction in volume with changes in moisture content.
Water and air occupy the pore spaces—the area between soil particles. The final ingredient of a soil is organic matter. Organic matter consists of dead plant and animal material and the billions of living organisms that inhabit soil.
The concern with soil in respect to building is the ability of soil to bear the load of the structure while remaining stable. Ensuring long-term stability requires proper compaction and consolidation of soil before a permanent load is placed upon it. Examples of a permanent load would be foundation footings and walls or a concrete floor or driveway slab.
The excavation process disturbs soil, loosening it and causing spaces between soil particles to become much larger. For this reason, engineering specifications often require that foundations be placed on undisturbed soil.
In areas at which a home is built partially or completely on fill, such as homes built on hillsides, that fill must be made as solid as possible before a permanent load is placed on it. This is done by mechanical compaction of the soil. Soil is placed in layers (called “lifts”). Each layer is mechanically compacted by impact and sometimes by vibration.
When larger areas such as a hillside lot are compacted, heavy equipment is used. For smaller areas like backfill around basement foundation walls, a jumping jack tamper is used which is operated by one person.
Compaction is the process of forcing air from the spaces between soil particles. Compaction with a jumping jack tamper is somewhat inexact. In determining the point at which soil is adequately compacted, the operator listens to the tone of the tamper impacting the soil. When soil is adequately compacted, the tone will have a ringing quality which will not change. A change in tone indicates that compaction is still taking place.
Compaction increases the density of the soil and improves its ability to bear a load. Compaction is affected by a number of factors:
- Soil type (clay, sand, silt, level of organic matter, etc.)
- Soil characteristics (uniformity, gradient, plasticity, etc.)
- Soil thickness
- Method of compaction
- Moisture content at the time of compaction.
Consolidation is the process of forcing water from the spaces between soil particles. Soil is more permeable to air than to water. This means that the compaction process may remove from the soil a large percentage of air, but a significant percentage of water may remain.
Soil undergoes both primary and secondary consolidation.
Primary consolidation is short-term and takes place during the mechanical compacting process. Secondary consolidation is long-term and takes place after the compaction process is complete and the permanent loads are in place.
During secondary consolidation, the weight placed on soil slowly forces water out of the spaces between soil particles. As this happens, soil particles will move close together and settling will occur. The source of the weight would be both the structure and the overlying soil.
The amount of secondary consolidation which can be expected increases with the depth of the affected area. An excavation with backfill 15 feet deep would experience more secondary consolidation than an excavation with backfill 8 feet deep.
A common scenario is when a structure is built partially on undisturbed soil and partially on compacted fill. Soil in these two areas will consolidate at different rates as the weight of the newly-built structure forces water from between soil particles. This is called “differential settlement”.
Settling will be reflected in any part of structure bearing upon the settled soil. In adequately-compacted soil, settling will be so minor that evidence won’t be visible. Extreme differential settlement will create stresses which are relieved by cracking.
Which materials crack depends on the properties of the material and the rate of settling. More brittle materials will crack first. The effects of soil movement are most often seen as cracks in interior and exterior wall coverings like drywall and plaster and in masonry foundation walls.
Even concrete, which most people think of as brittle, can bend if pressure is applied slowly over a long time period. If pressure is applied over a shorter time period, concrete will crack.
Compaction and consolidation are affected by the composition of the soil. Fine-grained soils have more interior surfac e area and can hold more air and water than course-grained soils.
Here's an example. Drywall is made of much courser particles than cement. An ounce of drywall dust contains about 5,000 square feet of interior surface area. An ounce of cement dust contains about 50,000 square feet of interior surface area.
This means that fine-grained soils like clays have more interior surface area which can contain water. In order to force water out of the spaces between particles, surface tension must be overcome. "Surface tension" is the tendency of water to cling to a surface. When you fill a glass with water, it's surface tension that makes the water level slightly higher around the edges where water comes into contact with the glass surface. Water is clinging to the glass.
The greater interior surface area of fine-grained soils results in greater surface tension. Fine-grained are also typically low-permeability soils, meaning that water moves through them slowly. These conditions increase the amount of time and pressure required for soil to consolidate. Soils will continue to consolidate until the resistance to pressure of the materials of which the soil is composed reach equilibrium with pressure from the weight of soil and structure above.
The rate of consolidation is affected by the soil composition, levels of moisture saturation, the amount and nature of the load on the soil and state of consolidation of the soil.
Another moisture-related problem is the addition of excessive moisture to the soil. This can create a condition in which water is absorbed into spaces between soil particles. Soil becomes less dense, which reduces its ability to support a load.


